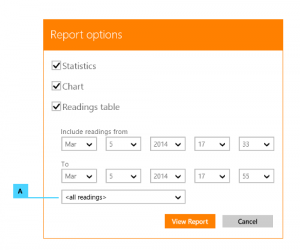
The report includes the logger identification and the log summary. The remaining content is available in sections that are chosen to be included in the following dialog.
By default, all log data is included. You can easily trim the log that is included in the report selecting a time interval using the available controls to select the start and end date/times. We’ve included a combo box with some common preset intervals to help you make a quick choice or use it as a starting point to tweak the interval (illustration key A).
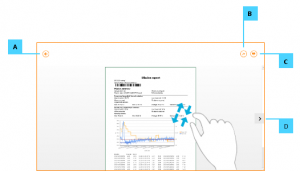
The report viewer shows a preview of the generated report as it would be printed or saved in a PDF file. Where you can perform the following operations using the controls described:
- Navigate between pages using the arrows at the left and right screen edges (illustration key D).
- Zoom (use pinch/stretch gesture if you’re using touch or CTRL + mouse wheel if you’re using a mouse).
- Print by tapping or clicking the command button at the top right corner (illustration key C).
- Export to PDF by tapping or clicking the command button at the top right corner (illustration key B).
Tap or click the ‘Back’ button (illustration key A) to go back to the previous page.
Export to PDF
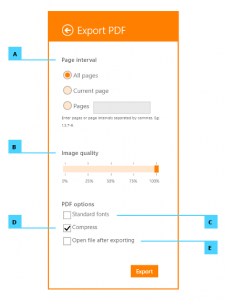
You can customize how the report will be exported to PDF, adjusting the following options as shown below.
- Which pages to export (illustration key A).
- Image quality (illustration key B).
- Use only standard fonts (illustration key C).
- Generate report in compressed format, decreasing disk cost (illustration key D).
- Automatically open the PDF file after the export operation (illustration key E).


